Headstone Photography
Before Leaving Home
- Before leaving home set the camera to take shots at around 2048 x 1536 (around 3Mp). Take some sample shots and check them on your PC.
- Ensure that date-stamping of photos is turned off.
- Clean the lens before leaving home and regularly during the day.
- If using an external GPS recorder make sure the date and time on your camera are set very accurately.
- Ensure that the battery and any spares are fully charged.
- Check on our website or elsewhere online for existing transcripts for the cemetery. If they include row and lot numbers, sort them in that order then print them out. You may contact us for a copy. Refer to them for any inscriptions that are difficult to read.
What to Bring
- For a comprehensive list of things to bring, and many other useful tips, see: www.stonepics.com/newfoundland_cemeteries/method.htm
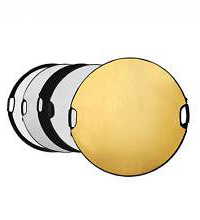
- Consider purchasing a photography reflector set for side-lighting of hard-to-read inscriptions (around $20 on eBay). One of the discs can also be used to shade the headstones. See below.
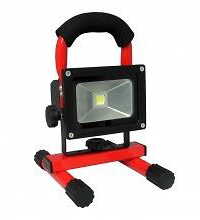
- Consider purchasing a rechargeable 12V LED floodlight for side-lighting (from $60 on eBay).
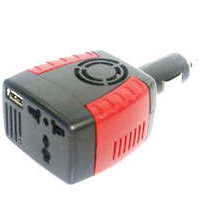
- Consider purchasing a 12V-240V inverter to allow camera batteries to be recharged on site from the cigarette lighter socket (around $20 on eBay).
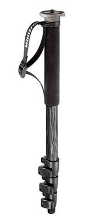
- Consider purchasing a single-leg tripod (monopod) (around $15 on eBay).
 |
 |
 |
 |
Methodology
- It is vital to work in a consistent, methodical manner when photographing headstones.
- Your first photograph should be of the name of the cemetery, either on a signboard or written on a piece of paper.
- Your next half dozen photos should be general overview shots of the cemetery for the main cemetery page.
- Before you take any headstone photos, walk around to determine the general layout of the cemetery.
- Draw a rough sketch and document your plan of attack. If you need to come back another day it will help you remember where you are up to.
- If rows and plots are numbered, take the photographs strictly in order of the numbering and record the photo number of the first photo in each row on a notepad.
- Walk up and down rows photographing every headstone. Do not take photographs randomly. Family groups are often clustered together so it is important to preserve that relationship.
- Photograph every headstone including ones that are broken, impossible to read or lying face down. Someone may advise us who it is.
- If headstones in the cemetery are arranged randomly, place a pebble on each headstone after it has been photographed so you know which ones have already been done.
- Take copious notes. If you know an inscription is hard to read, write down the details together with the photo number. It is much more difficult to read the inscription in a photograph. Only record the facts, not poetry etc.
- Rather than making written notes many cameras allow voice recordings to be attached to individual photographs. Experiment at home before you leave.
- Although less convenient, a digital voice recorder can also be used for note-taking (around $15 on eBay).
- If you take several photos of a headstone and can see which one is best, delete the others immediately. It will save a lot of time later.
- Be discreet and respectful of others. Do not photograph in the vicinity of mourners at a funeral.
- If challenged by anyone, explain politely that you are recording the cemetery for genealogical research purposes.
Lighting
- The best days to photograph headstones are ones where there is light overcast, reducing shadows.
- If there is full sun, the best time to photograph in around midday, as the shadows that form in engraved writing improve readability.
- Plan your work so you will not be photographing with low sun behind the headstones.
- If the sun is behind the headstone try using fill-in flash, although on reflective stones it may not help.
- Never take a photograph with your body shadowing half of a headstone. Move so it is in full sun or full shade.
Composition
- We photograph headstone inscriptions, not graves
- We are mainly interested in the facts on the headstone. Zoom in to capture them clearly.
- The photo can include the full headstone providing the text will be clearly readable when the photo is shrunk to 800 x 600..
- Including other text ("In Loving Memory of" etc.) is ok providing the main facts will remain readable when the image is shrunk.
- Photographs should generally be in landscape mode. Use portrait for tall headstones.
- Portrait shots should be rotated before being submitted. The free program Faststone Image Viewer can be used to rotate images with no loss of quality.
- Where there are multiple inscriptions on one headstone, capture them all in the one image if they will all remain readable.
- If the inscriptions are widely spaced or too small, take a wide-angle shot of the lot then individual shots of each inscription.
- For large, tall headstones take one portrait shot of the whole headstone then individual landscape shots of each inscription.
- If there are multiple plaques on a single grave take a wide-angle shot of the lot then close-ups of each one.
- Try to take photographs square-on and perpendicular to the face. Where possible stand at the centre of the foot of the grave.
- Line up the top or bottom edge carefully so the image is not tilted and the sides appear parallel. If the headstone is leaning sideways, tilt the camera to match.
- For shiny headstones take care that your reflection cannot be seen. Squat down or stand to one side if necessary.
- Remove any flowers or grass etc. that obscure the inscription before taking the photograph. Replace flowers etc. when finished.
- Photos are shrunk and if necessary cropped to a 4:3 ratio for web display (800 x 600). Try to choose a 4:3 camera setting (eg. 2048 x 1536). If your setting is wide-screen (eg. 16:9) ensure your photos have some spare space each side for cropping.
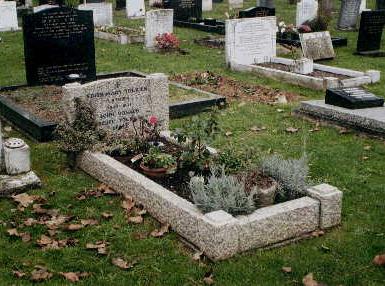 |
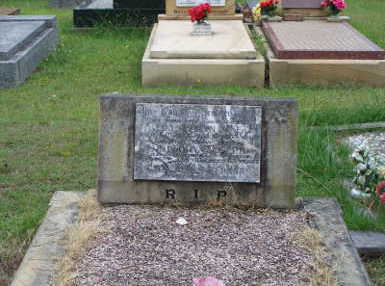 |
| No Good (Too distant) | No Good (Too distant) | 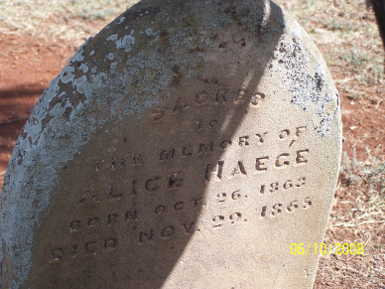 |
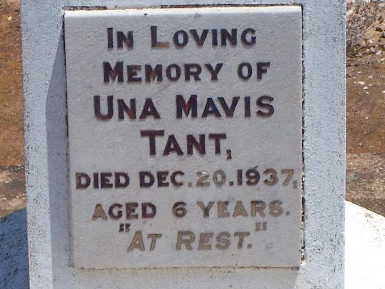 |
| No Good (Shadow, angled, date-stamped) | Good |
Readability
- The objective is to capture inscription images that are readable.
- If you cannot read the inscription in the viewfinder or screen, the resultant image will likely be difficult to transcribe.
- The most difficult stones to capture are the speckled grey or red granite, especially when the paint has disappeared from the engraving.
- Other difficult ones include weathered sandstone or stones with lichen or moss growing on them.
- Use a tripod to avoid movement blurring with zoomed shots, unless your camera has image stabilization.
Inscription Enhancement
There are various methods of improving inscription legibility. The main consideration is that no damage be caused to headstones.
Bear in mind however that if the writing is not made legible, that person's ancestors may never know where they are buried. Some discretion is therefore called for.
- For grey or red granite try photographing the headstone from different angles.
- Use a studio reflector to reflect sunlight across the face from the side so the shadows enhance the carved writing.
- Use a portable floodlight to light the headstone from the side.
- If you have a removable flash, take it off and position it to one side to enhance the shadows.
- When using side lighting you should shade the headstone from direct sunlight.
- Lichen and moss can be carefully removed with a plastic scraper. Take extreme care on sandstone, limestone, timber etc.
- As a last resort gently rub across the lettering with the flat side of a piece of chalk or a piece of Gyprock with the paper removed from one side.
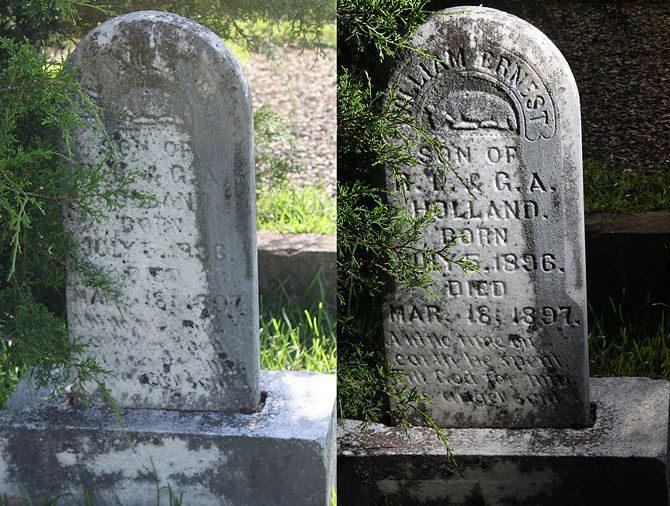
Effect of side lighting. Image courtesy of www.wikihow.com/Photograph-a-Tombstone
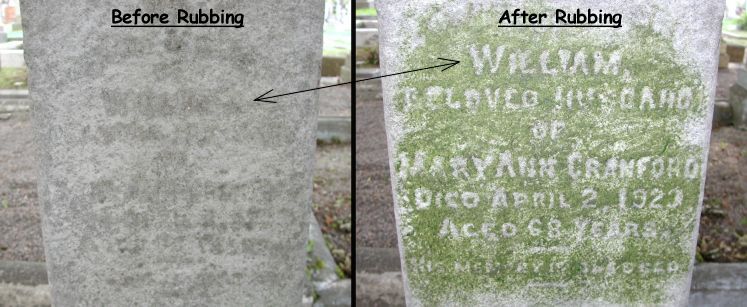
Effect of chalk rubbing. Image courtesy of www.stonepics.com/newfoundland_cemeteries/method.htm
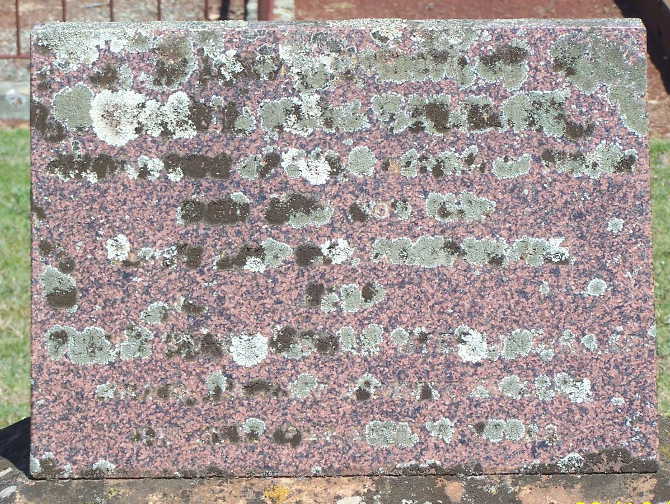
A plastic scraper could have turned this from a meaningless lump of stone into a record of someone's ancestor.